

Scroll down for English version
Dopo aver fatto due scatole così a tutti i partecipanti dell’MTC difebbraio , che dovevano almeno provare a fare la RV gluten free due volte, non potevo proprio io esimermi…anzi c’è anche la terza versione J .
Tutto ciò solo per Stefania, la vincitrice di questo mese , per
divulgare il più possibile che gluten free si può e che gluten free è facile.


Con questa torta, che ho ovviamente servito alla festa del mio
compleanno , partecipo all’MTC di febbraio 2013 .
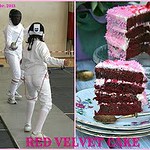
RED VELVET CAKE gluten free con CREMA DI RICOTTA
(come da ricetta di Cardamomo &co.)
160 gr di farina di riso sottilissima tipo amido (Alce Nero)
60 gr di fecola ( Pedon)
30 gr di amido di mais
1/2 cucchiaino di sale
8 gr cacao amaro (Perugina)
110 gr burro non salato a temperatura ambiente
300 gr di zucchero
3 uova medie
1 cucchiaino da caffè di estratto vaniglia bourbon
240 ml di buttermilk , questa volta ho usato quello americano
originale
1 cucchiaio di colorante rosso “No Taste Red” Wilton
1 cucchiaino di aceto bianco
1 cucchiaino di bicarbonato di sodio
Per farcire: CREMA DI RICOTTA (ricetta di seguito)
Per decorare :400 gr circa di panna montata leggermente zuccherata
Preparate e pesate tutti gli ingredienti. Io ho lavorato tutto con
le fruste elettriche.
n un recipiente mescolate le farine, il sale, il cacao.
In un altro recipiente, sbattete il burro per 2-3 minuti, finché
sarà soffice e poi aggiungete lo zucchero e sbattete per altri 3 minuti.
Aggiungete le uova, una alla volta, sbattendo 30 secondi dopo ogni
aggiunta.
Mescolate il colorante al
buttermilk e quindi versate poco per volta al composto di burro, alternando le
farine al buttermilk , possibilmente
iniziate e finite con la farina.
In un bicchiere mescolate il bicarbonato all’aceto bianco, facendo
attenzione a versarlo subito nell'impasto (altrimenti ve lo troverete per tutta
la cucina) e incorporatelo bene con una spatola.
Versate il composto dividendolo per due teglie rettangolari medie
ed infornate. Cuocete per circa 15-20 minuti,
fate la prova stuzzicadenti, ma attenzione io ho cotto 25 minuti ed è troppo ,
infatti il colore ha cominciato a scurirsi troppo rispetto all’altra volta .
Questo è importante per mantenere il colore di un bel rosso. Più cuocete
l’impasto più tenderà al marrone e quindi perderà la sua caratteristica di RED.
Lasciate raffreddare le basi su una griglia..Tagliate ogni base a metà.
Il trucco sta nel chiudere le basi in pellicola trasparente e passarle almeno 2 ore in freezer (la versatilità della RV sta proprio nel fatto che la si può preparare e congelare fino a due settimane senza perdere nulla della sua bontà , quindi è comoda per portarsi avanti il lavoro con un certo anticipo).
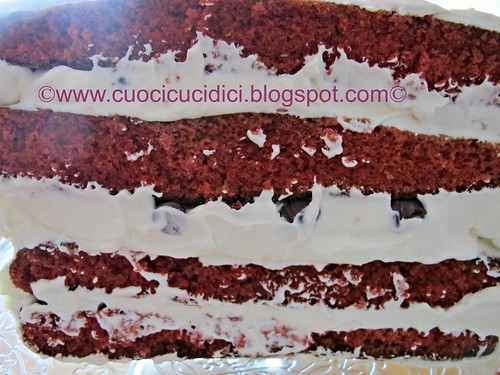
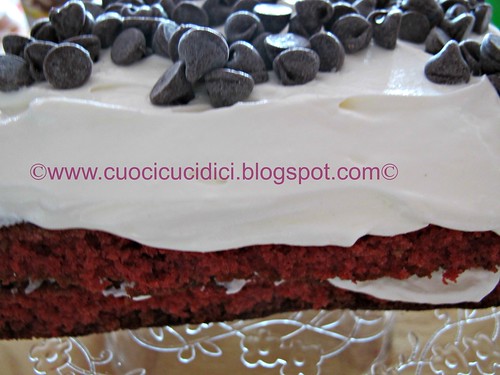
Quando vorrete preparare la torta, preparate le crema alla ricotta, e solo quando questa è pronta , tirate fuori dal freezer le basi della torta. Mettete una prima base su un piatto da portata e farcite con la crema alla ricotta, versate un cucchiaio di gocce di cioccolato e coprite con un altro strato di torta, e proseguite. Quando avrete coperto tutto con l’ultima base di torta. Ricoprite con panna montata leggermente zuccherata e lisciate bene tutto con la spatola e decorate a vostro gusto.
CREMA ALLA RICOTTA
500 gr di ricotta di pecora fresca6 cucchiai di gocce di cioccolato (vanno sulla crema , non mescolate assieme)
2 cucchiai di mascarpone
5 cucchiai di zucchero
2 cucchiai di panna montata
Il giorno prima scolate la ricotta tutta la notte.
Passate la ricotta al setaccio (attenzione non mescolatela con
fruste elettriche o robot, perché otterreste una crema liquida), aggiungete lo
zucchero e con un cucchiaio di legno mescolate , e aggiungete il mascarpone e
la panna. Amalgamate bene tutto e mettete in frigo fino al momento in cui lo
userete.
This is the same cake I posted some days ago, but the form and the
filling are different. Hope you enjoy and have a special Saturday, xxoxoxoxox
GLUTEN FREE RED VELVET AND RICOTTA CHEESECREAM
1 + 1/3 cup rice flour
4 Tbsp potato starch
2 Tbsp corn starch
1/2 cup butter
1 1/2 cups granulated sugar
3 eggs
1 tablespoon Red (no-taste) Icing Color Wilton
1 teaspoon pure vanilla extract
1 ½ tsp cocoa powder
1 teaspoon salt
1 cup buttermilk
1 1/2 teaspoons baking soda
1 tablespoon white vinegar
For filling: Ricotta cheesecream (see recipe below)
For decorating: 2 cups sweet whipped cream
Preheat the oven to 340°F .
Take the two rectangular pans, cover them with two sheets of parchment
paper and grease them with some butter.
Prepare and weigh all the ingredients. I have worked everything
using electric whisk.
In a bowl mix flours , salt and cocoa and set aside. In another bowl, beat the butter
for 2-3 minutes, until it is soft, then add sugar and beat for other 3 minutes.Add
the eggs, one at a time, beating 30 seconds after each addition.
Mix icing color with
buttermilk.
Pour the buttermilk a little at a time to the butter mixture and
flours , alternatively. Possibly begin and end with the flours.
In a glass mix baking soda with white vinegar, making sure to pour
in the mixture immediately and incorporate it well with a spatula.
Pour the mixture divided by the two pans and bake. Cook for about 15-20 minutes, make
a toothpick proof, don’t cook more because it could become brown and not red. Let
the cake cool on a rack.
Cut every cake in two pieces.
The trick is to close cakess in plastic wrap and put them at least 2 hours in the freezer (the
versatility of the RV lies in the fact that you can prepare and freezeit
even for up to two weeks without losing
any of its goodness, so it is convenient to bake forward well in advance).
When you want to fill and decorate , take the cakes, fill with
ricotta cheesecream and add for every lyer some chocolate morsels. Cover with
whipped sweet cream and decorate as you prefer.
RICOTTA CHEESECREAM
2 cups of fresh ricotta (I
used sheep ricotta cheese)
6 Tbsp semisweet chocolate morsels
(they go on the cream, not mixed together)
2 Tbsp Mascarpone cheese
5Tbsp of sugar
2Tbsp of whipped cream
The day before drain the
ricotta overnight.
Pass the ricotta through a sieve (be careful not to mix with electric
beaters or mixxer, because you would get a liquid cream), add the sugar and
stir with a wooden spoon, and add the mascarpone and whipped cream. Mix everything well and
refrigerate until such time as you will use it.
che meraviglia, si vede proprio che la ami questa torta, ma come fai a fare i decori così? :-D
RispondiEliminaGuardando le tue torte mi vergogno profondamente della mia torta, hai una manualità che nessuna ha!
RispondiEliminaLa crema di ricotta con le aggiunte da te fatte, deve essere un incanto, molto più leggera e soprattutto più consona alle nostre corde! Ah come avrei voluta assaggiarla!
perfetta sia dentro che fuori!!! devo riprovarci :-)
RispondiEliminabellissima la torta, il decoro, il ripieno!!! mi fai venir voglia di fare la terza versione!!!
RispondiEliminagustosa e torppo bella fori, brava!
RispondiEliminasull'ultima foto, ho avuto un mancamento.
RispondiEliminaVeda lei...:-)
Bella e gustosissima! Approvata a pieni voti ;-)
RispondiEliminamamma che buona la crema di ricotta è super per la red velvet complimenti
RispondiEliminaC H E G O D U R I A !!!!!!!!!!!!!!!!!!!!!!!!!!!!!
RispondiEliminaoltre ad essere bellissima, il ripieno alla ricotta e gocce di cioccolato mi fa veramente impazzire.
RispondiEliminasuper-brava, flavia!