

Scroll down for English version
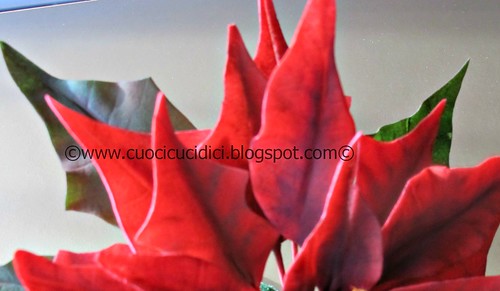
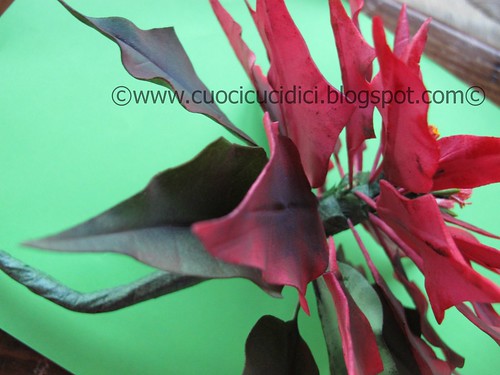
Questa stella di Natale o Poinsettia l’ho fatta io e ancora non mi
sembra vero e sono così contenta di come è venuta che con la mia amica Laura (i
venatori per le foglie e i petali della Stella di Natale sono di sua produzione)abbiamo pensato di farvi un regalo: un TUTORIAL per poterla fare
anche voi . Non è difficile , ma bisogna avere tutto il materiale a
disposizione e se si ha compagnia si lavora meglio J , chiacchierando e confrontandosi .
Materiale:
-venatore foglie Poinsettia
-flower paste (o pasta di zucchero addizionata di cmc ) rossa e verde
-filo di cotone (quello da imbastire è perfetto)
-fili di ferro (wires 24) , quelli da fiorista sottili
-guttaperca (flore tapes)
-bisturi (o cutter-taglierino)
-cell board (tavoletta con le scanalature per inserire i fili di ferro)
-tavoletta di spugna per la frillatura
-mattarellino
-ball tool (attrezzino con la palletta finale per assottigliare i bordi di
petali e foglie)
-colori in polvere (noi usiamo quelli Squires Kitchen che per le sfumature
sono eccellenti):
rosso poinsettia o poppy o ruby – verde foliage green o vine - violet o blackberry- chestnut brown -
giallo
-un po’ di albume d’uovo
-acqua (in una ciotolina)
-pennellini sottili (per ricalcare col colore le venature esterne delle
foglie )
-pennello mop (o quelli da trucco, per sfumare)
-tenagliette e pinze per piegare e tagliare i fil di ferro
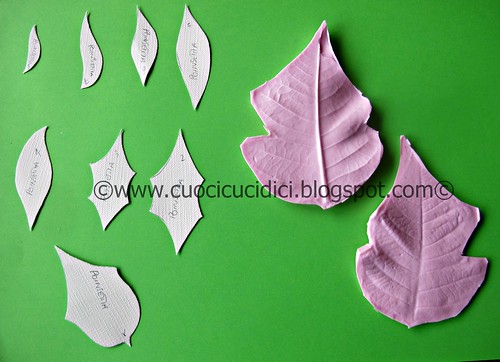
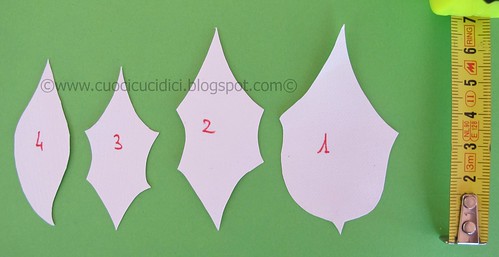
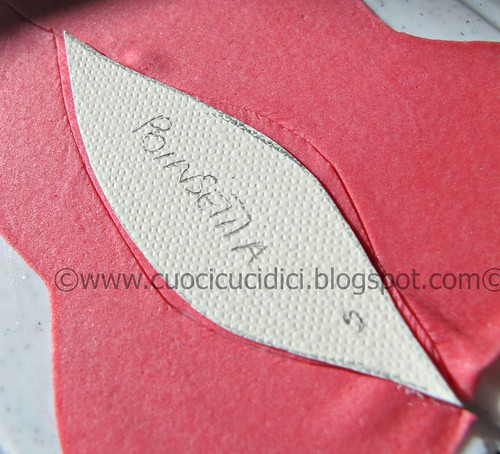
-Ricopiate le sagome per petali e foglie su cartoncino con le proporzioni
nelle foto:
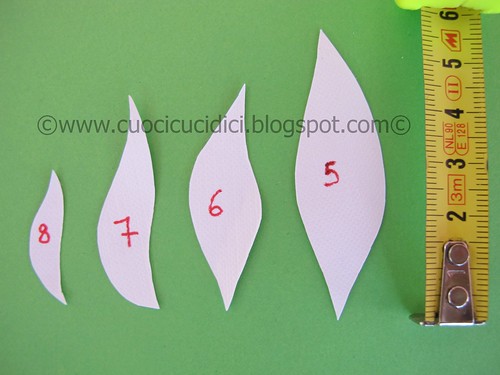
vi serviranno 3 petali del n.8 (rosso)
3 petali del
n.7 (rosso)
3 petali del n.6 (rosso)
3 petali del
n.5 (rosso)
3 petali del n.4 (rosso)
5 petali del n.3 (rosso)
5 petali
del n.2 (rosso)
5 petali
del n.1 (rosso)
7 foglie
del n.1 (verde)
Ungete con del Crisco (o burro) il cell board
Stendete la gumpaste sul cell board
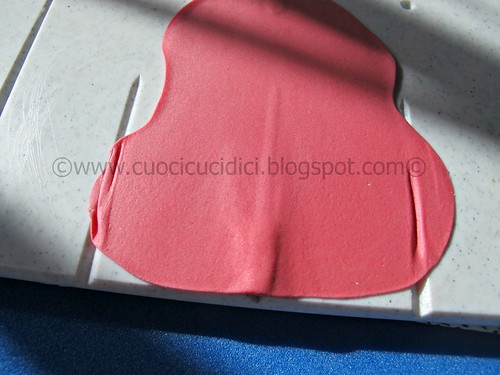
Prendete una sagoma alla volta e ritagliate con il bisturi
Prendete una sagoma alla volta e ritagliate con il bisturi
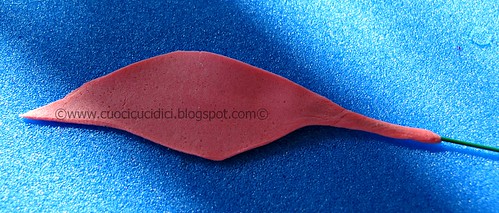
Inserite il fil di ferro nei petali (nel punto centrale dove grazie al
cell board avete più pasta)
Allungate la base di gum paste della foglia o del petalo sul fil di ferro
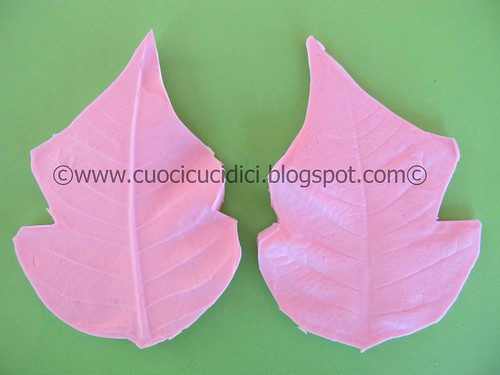
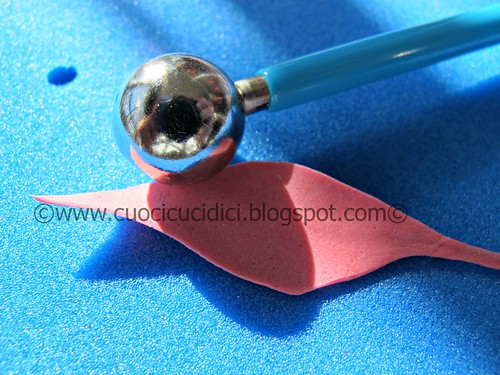
Passate i bordi di foglie e petali sulla spugna pressando con il ball tool
Pressate questi petali o foglie nel venatore ( per info e spedizionicontattate Laura)
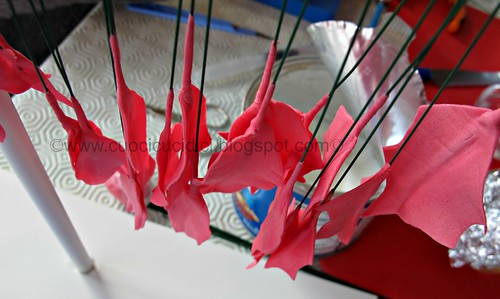
Mettete ad asciugare a testa in giù appesi
Nel frattempo preparate i pistilli con il filo di cotone(di questi ne
serviranno 8)
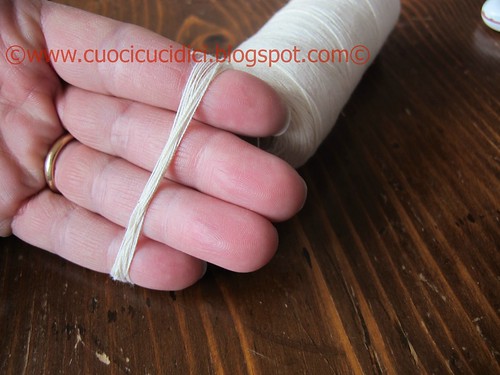
Arrotolate il filo sulle 4 dita della mano
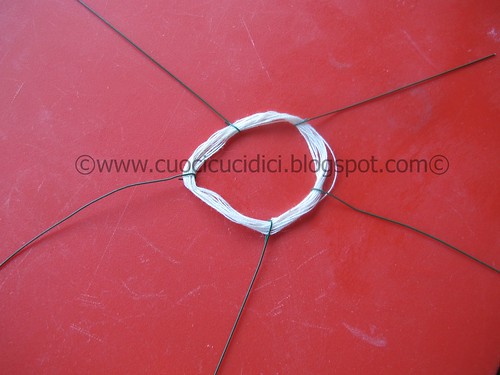
Fermate con i fil di ferro il filo in 5 punti equidistanti
Stringete con la tenaglietta i capi del fil di ferro
Tagliate i fili di cotone
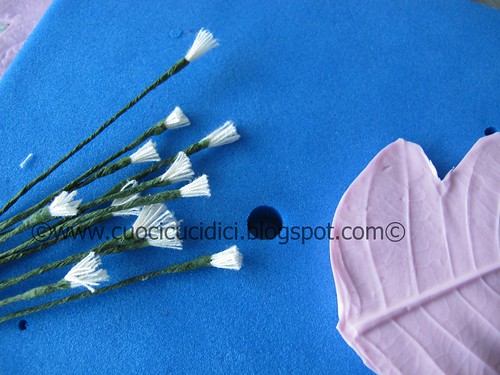
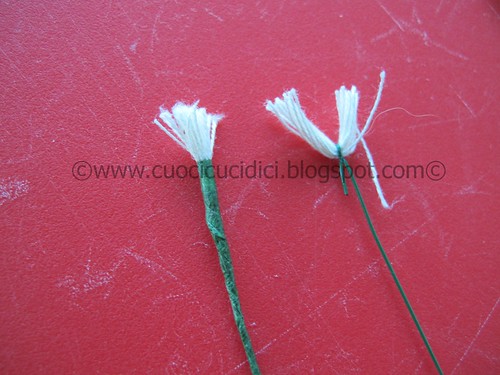
Chiudete il “ciuffetto” di fili di cotone aiutandovi con la guttaperca
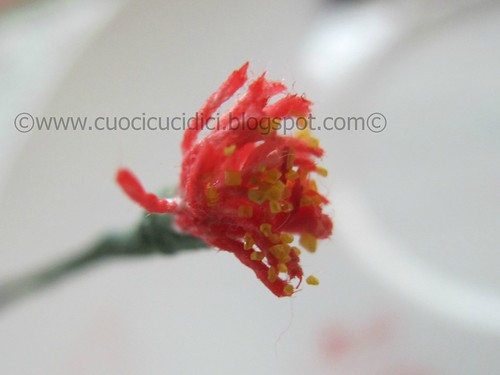
Con un pennellino passate un po’ di albume sui ciuffetti di cotone
Colorateli di rosso
Passate le punte nel colore in polvere giallo (o meglio ancora se avete il
giallo granulare per polline )

Poi preparate gli altri pistilli in gum paste (di questi ne serviranno 13)
(bagnate la punta del fil di ferro con acqua , appoggiateci una pallina di
gum paste, e “allungatela” sul filo, con il bisturi fate un segnetto per il
lungo). Con un verde mescolato ad una puntina di chestnut brown (marrone) sfumate
i 13 pistilli in gum paste .
Colorate leggermente solo la punta di giallo .


Con il pennellino mop (o quelli da trucco per sfumare) colorate con il
colore in polvere rosso tutti i petali rossi; di verde le foglie verdi.
Riprendete i petali rossi e con un pennellino sottile usando un mix di
colori in polvere (verde, marrone e un tocco di violet) ripassate le venature.
Con il mop ripassate il centro delle foglie e poi sfumate tutto dal centro
verso l’esterno.
Per le foglie verdi , procedete come per i petali rossi , ma utilizzando
un mix di marrone e violet o blackberry, mentre ai bordi ripassate e sfumate il
colore rosso .
Fate i mazzetti dei pistilli:
4 formati da due pistilli con il filo e uno con gum paste
3 formati da tre pistilli verdi in gum paste
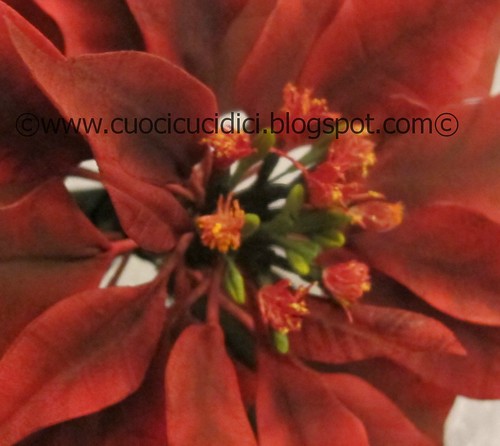
A questo punto si passa all’assemblaggio del fiore . Unite i mazzetti dei
pistilli , chiudete con la guttaperca; unite i tre petali più piccoli (n.8) e
poi a crescere , riempendo di volta in volta tutto a giro, ricordandovi ad ogni
foglia o petalo aggiunto di fermare tutto con la guttaperca . Finite con le 7
foglie verdi.
Decorate il vostro dolce, la vostra torta di Natale, o il vostro Panettone
o Pandoro.
Buon lavoro a tutti :D
English version
I can’t believe I was able to make
this gum paste Poinsettia…I was so happy that I want to show you how I made!!!
Material:
Poinsettia leaves veiners- (you can
contact Laura for info and delivery)
-Gum paste (or sugar paste with
added cmc) red and green
-White cotton thread
-Wires
-florist tapes
-cutter
-cell board (cake board)
-sponge for frilling
-rolling pin
-Ball-tool
-Powder colors (we use Squires Kitchen for the shades and they are
excellent):
red poinsettia and poppy or ruby
- green foliage or green vine -
blackberry-violet or chestnut brown - yellow
-egg white
-water (in a bowl)
-thin brush (to trace the veins
external to the color of the leaves)
-Brush-mop (or those from makeup,
to fade)
-pliers to bend and cut wire
-Copied templates for petals and
leaves on paper with the proportions in the photos.
-You will need all these leaves and
petals:
3 petals template n.8 (red)
3 petals
template n.7 (rosso)
3 petals templaten.6 (red)
3 petals
template n.5 (red)
3 petals template n.4 (red)
5 petals template n.3 (red)
5 petals template n.2 (red)
5 petals template
n.1 (red)
7 leaves template n.1 (green)
Grease the cell board with a veil of Crisco (or butter)
Roll out the gumpaste on the cell
board.
Take one shape at a time and cut
with a cutter
Insert the wire in the petals (the
midpoint where thanks to the cell board have more gum paste)
Extend the base of the leaf gum
paste or petal on the wire
Past the edges of leaves and petals
with the ball tool by pressing on the
sponge
Press these petals or leaves in
veiner (for info and delivery contactLaura)
Put to dry upside down hanging
Meanwhile, prepare the pistils with
cotton thread (these will serve 8)
Wrap the wire on the 4 fingers
Stop with the wire in the wire 5
points equidistant
Tighten the tenaglietta the leaders
of the wire
Cut the cotton threads
Close the "crest" of
cotton threads with the aid of the florist tape
With a small thin brush past a
little 'egg white tufts of cotton on
Color them red
Spend points in the yellow powder color
(or better if you have the yellow granular pollen)
Then prepare the other pistils in
gum paste (these will serve 13)
(Wet the tip of the wire with
water, put a ball of gum paste on it ,
and "stretch it" on the wire, with the cutter make a little sign for the length). Shade with amix of green and a pinch of chestnut brown the 13 pistils in gum paste.
Color the tip with yellow.
Color with the mop brush all red petals with red color , and
green leaves with green.
Shoot the petals and red with a
thin brush using a mixture of powder colors (green, brown and a touch of
violet) rehearse the veins.
With the mop rehearse the center of
the leaves and then all gradient from the center outward.
For the green leaves, proceed as
for the red petals, but using a mix of brown and violet and blackberry, while
the edges rehearse and shaded red.
Be the piles of pistils:
4 consist of two pistils with the
wire and one with gum paste
3 consist of three pistils green
gum paste
At this point it passes the
assembly of the flower. Add the bunches of the pistils, close with florist
tape, join the three smaller petals (8) and then to grow, filling in from time
to time all around, remembering each leaf or petal added to stop everything
with florist petals. Finish with the seven
green leaves.
Decorate your cake, your Christmas
cake, Panettone or Pandoro or your.
Good job to you all J
Flavia
E' meravigliosaaaaaaa!!hai le mani d'oro e questa stella di natale è stupenda...segno tutto non si sa mai:-)!!Baci,Imma
RispondiEliminaguarda è solo questione di organizzare il lavoro...in sè è semplice
EliminaThat is absolutely beautiful! Congrats and thanks for the great tutorial-enjoy:@)
RispondiElimina:D , thanks
Eliminaun'opera d'arte...bravissima!
RispondiEliminabacione
Non ce la potrò fare mai!
RispondiEliminaMa certo che ce la puoi fare è lo stesso principio dell'ibiscus fatto insieme quest'estate :D
EliminaOk. Sei di un altro pianeta ^_^
RispondiEliminaCome sei brava ,è bellissima
RispondiEliminacome sei brava ,è bellissima
RispondiEliminameravigliose!!!!
RispondiEliminaMy gosh..Bravo..
RispondiEliminaWhat a work of art..and patience:-)
Bellissimaaaa e che ridere per farla :D Bellissimo tutorial, presto lo metto anche io :D Baciotti, Laura
RispondiEliminaE' bellissima! Salvo il tutorial, chissà se un giorno, quando avrò finalmente un pò più di tempo, non potrò realizzarla anch'io!
RispondiEliminaDel tutto priva di manualità e di pazienza, non posso che inchinarmi di fronte alle tue doti :) Complimentissimi!
RispondiEliminaSo pretty! Thank you for sharing how to do them! :)
RispondiEliminaThank you for sharing how to do them!
RispondiEliminaGod bless you !
bellissimo tutorials ho acquistato anche i venatori da Laura volevo solo chiederti se le sagome delle foglie potevo scaricarle da qualche parte...
RispondiEliminabellissimo tutorial ho anche acquistato i venatori da Laura volevo solo chiederti se posso scaricare le sagome delle foglie da qualche parte!
RispondiEliminaCaspita se siete brave, una realizzazione bellissima.
RispondiEliminaCerti lavori si fanno molto più volentieri insieme, diventa molto più che un divertimento, ma amicizia, accordo.